DIGITAL PAINTING
Digital painting is a method of creating an art object (painting) digitally and/or a technique for making digital art in the computer. Basically we use PHOTOSHOP during digital painting.
TASK 1 : VALUE
1. As a basic, our lecturer teaches us how to use VALUE in digital painting to make the object look more 3D2. First, choose the colour we want example ( yellow ) and choose 2 or 3 lightness and darkness of colour

3. After choose value colour, as beginner, we draw a shape that we want for fill with value colour.

4. After that, use MAGIC WAND TOOL to select the box for prevent us paint the background. After selection, fill the box with lighter yellow as the base colour.

5. Then put the next colour with the new layer, and make some shadow on the box.
So repeat this step from lightness colour to darkness colour and make it more details more 3D


6. After we put all the colour we choose, the final step is use the brightest colour to make a highlight . Highlight is the last step to make object more 3D and realistic.
So, we can go choose the more lightness yellow or white.

7. So, this is the result tat use value to make it look more nice and 3D. After that, we ordered to create other shape and paint them with value
BASIC DIGITAL PAINTING ARTWORKs


TASK 2 : PORTRAIT
The 2nd week, our lecturer want us to choose a portrait from internet and use complementary colour to paint it as digital painting.
Lecturer suggest use complementary colour because he want us more understand about the detail example ( where is shadow, where is highlight, where is brightness )
In the progress, we also have use value tat we learn in 1st week. So, let me show how i complete my PORTRAIT ARTWORK.
1. Choose a portrait picture from internet. ( i choose jackie chan as my PORTRAIT )

2. After that , use small size brush to draw the outline of the portrait. This is for make sure we will more accurate and easily paint the portrait


3. After draw the outline of portrait, choose the complementary colour from lightness to darkness. I was choose blue and yellow orange as my complementary colour

4. After that, normally i will create a new layer and copy a small portrait picture at beside to let me more easily know where is the highlight or shadow and accurate use the value of colour.

5. Then, use medium of blue colour as the base of face colour.

6. After that, use one level lighter blue colour to paint some details depend on the portrait .

7. Furthermore, use the dark colour example ( dark blue or black ) to paint the most dark area and make it more details.

8. After that, orange as our highlight colour. Before tat, we use lighter blue to paint on shiny area 1st.

9. After we use lighter blue to paint the shiny area, then we use yellow orange to make it more details and highlight.

10. The face is complete. The next part is for the hair. Use medium of yellow orange
( brown ) as the base of hair colour. And use small size brush with smooth to create some hair effect.

11. After that, use dark blue as a shadow colour to paint and create some hair effect also.

12. Then, use yellow orange to make some highlight on the top of hair and create some hair effect also.

13. After this, make some overall to the hair. Create some hait effect aournd the head and make it more details more realistic.

14. After the hair part, use yellow orange as the base colour of cloth. Then create a new layer and use blue colour as the shadow area to make the cloth more details.


15. After make the cloth details, make some overall, erase and make it clearly.

16. The last step is put the background with colour. As a complementary colour portrait, i use yellow orange again as my background to make all of this portrait look like pop art. I also paint the backgroudn with some blur blur effect to reach depth of field principle.

( brown ) as the base of hair colour. And use small size brush with smooth to create some hair effect.
11. After that, use dark blue as a shadow colour to paint and create some hair effect also.
12. Then, use yellow orange to make some highlight on the top of hair and create some hair effect also.
13. After this, make some overall to the hair. Create some hait effect aournd the head and make it more details more realistic.
14. After the hair part, use yellow orange as the base colour of cloth. Then create a new layer and use blue colour as the shadow area to make the cloth more details.
15. After make the cloth details, make some overall, erase and make it clearly.
16. The last step is put the background with colour. As a complementary colour portrait, i use yellow orange again as my background to make all of this portrait look like pop art. I also paint the backgroudn with some blur blur effect to reach depth of field principle.
DIGITAL PAINTING PORTRAIT ARTWORK

TASK 3 : MATTE PAINTING
Matte painting is a painted representation of a landscape, set, or distant location that allows filmmakers to create the illusion of an environment that is nonexistent in real life.
In Matte painting, there are 60% for EDIT and 40% for PAINTING.
Our lecturer show us some slideshow how to create a matte painting ( the effect, th broken building and so one )
So, we ordered to create our own Matte Painting and go online search some picture to put into edit.
MY IDEA is ( a upside down city then can connect both of them ) ( fire or destroy )
( a plane ) ( and some space effect at the background ) ( cloud or smoke )
1. I research some picture and choose some that i want.


.jpg)
2. all the research, i start my mattle painting with put the city on top and bottom and erase the middle area that i dont want. Create new layer when new thing input.


3. After that, i use DUBAI TOWER to connect this 2 of city, and put some building depend the DUBAI TOWER.


4. These building are use painting to make it colourful.

5. After that, i use The Top of Paris Tower to edit the middle of this tower. Then use brush to painting some area make it different.


6. Then, i use black colour with brush and adjust opacity to paint the city and make it darken.

7. I also paint some tower with brush because there are some distance from the scene, so i use brush for make them blur .
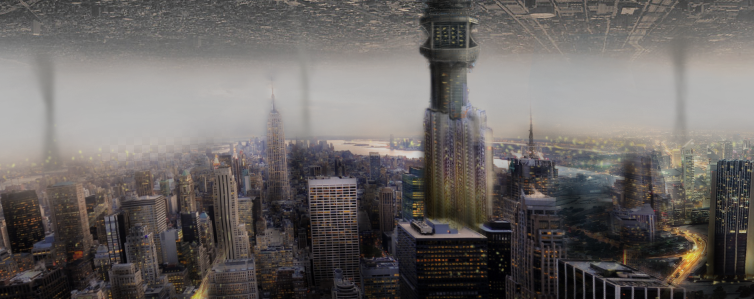
8. Create some street with brighness colour

9. After that, use brightness colour to paint all of the building depend the direction of the light coming.


10. Try to make all of the light or shadow more perfect more details, more nature

11. After that, i paint some red colour to the city, through the online research, the future city colour have some pink or red colour.

12. To make the city more technology and beautiful, i use brush n create some small brightness light to the city


13. The next is one of important part, to make this city look destroy or fire, the smoke is very important on this effect. The outcome is realistic. During edit smoke i will change the picture to scene and use some brush make it look nice.


14. After edit the smoke n fire, i use the picture that i choose from internet to edit the backgroud.


15. the next part is the most important part, i want the middle of tower have some light that mean the connecter of this 2 city. So, it need a nice and powerful effect. So, i go online go download a blue flare picture to edit it into the tower. Same, use scene to make the picture look like fill in the city. and erase some light that i dont need.


The light effect make all of the city look nice and high technology

16. After that, i going to put a plane in the sky, so i will put so cloud to make it look nice.


17. To make the behind of plane have some turbo or fire, i go online search some picture and use brush with orange colour make it look nice and realistic. i also brush the plane with some highlight.


SAMPLE OF CHARACTER


MY CHARACTER REFERENCE
FINAL CHARACTER SKETCH OUT


 So, this is my final character

 After we done our final character, lecturer suggest us to put a background for our character, make it more interest and more "WOW"
.jpg) Hospital
Hospital
.jpg) Broken Door
Broken Door
.jpg) Broken Window
Broken Window
.jpg) Dead Body
Dead Body
.jpg) Blood Texture
Blood Texture
.jpg)


10. Try to make all of the light or shadow more perfect more details, more nature
11. After that, i paint some red colour to the city, through the online research, the future city colour have some pink or red colour.
12. To make the city more technology and beautiful, i use brush n create some small brightness light to the city
13. The next is one of important part, to make this city look destroy or fire, the smoke is very important on this effect. The outcome is realistic. During edit smoke i will change the picture to scene and use some brush make it look nice.
14. After edit the smoke n fire, i use the picture that i choose from internet to edit the backgroud.
15. the next part is the most important part, i want the middle of tower have some light that mean the connecter of this 2 city. So, it need a nice and powerful effect. So, i go online go download a blue flare picture to edit it into the tower. Same, use scene to make the picture look like fill in the city. and erase some light that i dont need.
The light effect make all of the city look nice and high technology
16. After that, i going to put a plane in the sky, so i will put so cloud to make it look nice.
17. To make the behind of plane have some turbo or fire, i go online search some picture and use brush with orange colour make it look nice and realistic. i also brush the plane with some highlight.
18. To do some overall, i also paint some blue on top of city look like there are not some technology, and the background edit by a space but blur.
19. At the last, erase some area that dont need. Finally, i done my matte painting and have 2 type. One is normal, other is rain.
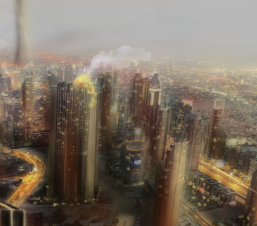
MATTE PAINTING ARTWORK
FINAL PROJECT : FINAL CHARACTER
After we learned basic digital painting, portrait and matte painting, we need to do our own character as final assignment, lecturer also show us some sample of character and lecturer want us to do some new, monster style of character. Manga character is not so good because manga is very normally and not so feel of "WOW" , not so special.
SAMPLE OF CHARACTER

Before that, i have no idea what type of character should i create, im very worry. And very grateful to lecturer because he give some idea and show me some reference when i stuck in create a character.
During some reference and idea, i have create my own monster type of character and sketch it out.
MY CHARACTER REFERENCE


My idea and concept basically combined the FLY and THE THING(movie) and become my monster character. I also use finger as the legs of FLY when i saw my finger.
FINAL CHARACTER SKETCH OUT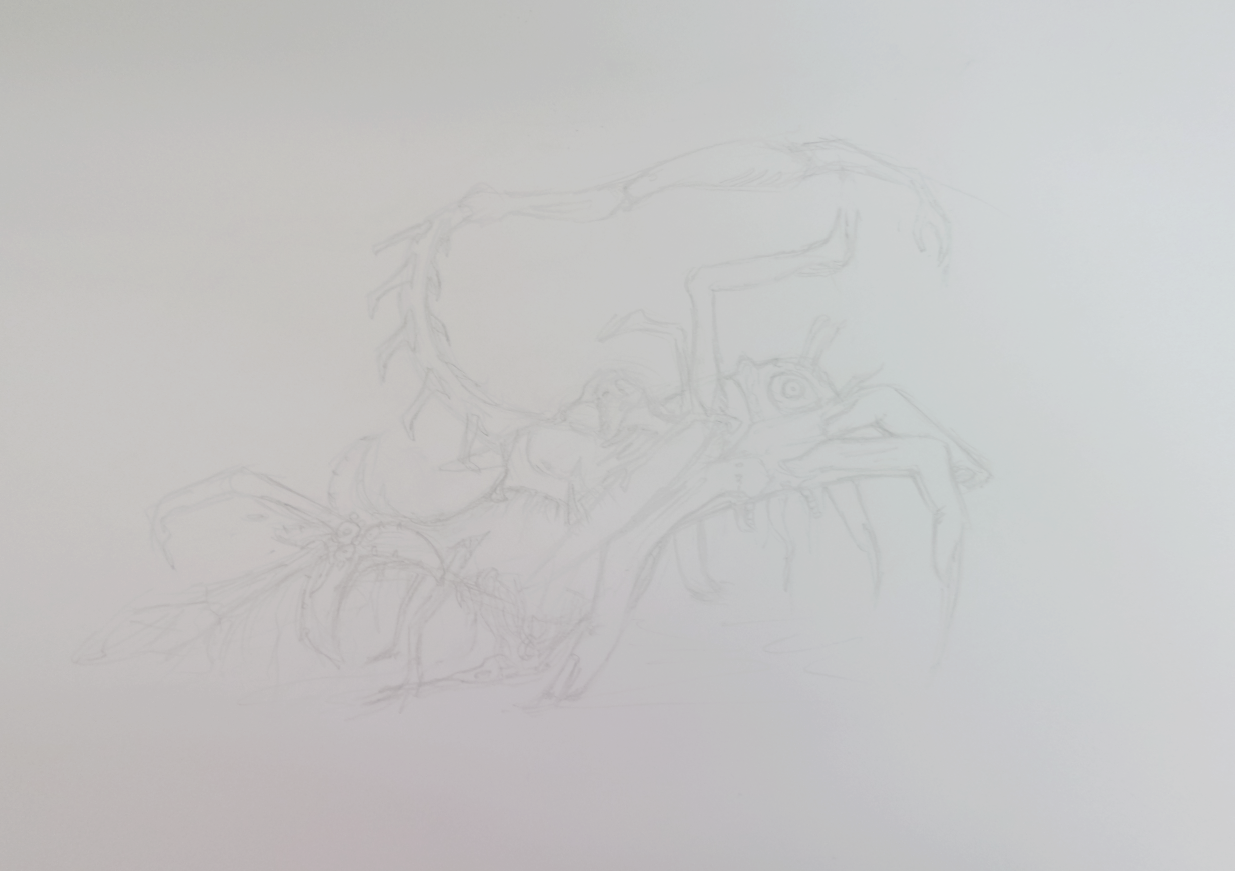
Through lecturer suggestion, i change and finally sketch out, create my own monster character for the final assignment.
PROCESS
So, after my character pattern and sketch is ready. Then i start to paint it use PHOTOSHOP.
Like the digital painting basic, put the base colour then start to details.
Base colour

Details
Base colour

Details
Base colour


 Base colour
 Details

 Base colour
 Details

 Base colour
 Details
Details
Base colour
Details
Base colour
Details
Details
Details
Details
Base colour
Details
BACKGROUND MATTE PAINTING
Blood Texture

Broken Floor
1st, I put the hospital scene as background and edit it to a little bit green, make it more horro feeling.
After that, mirror the half of part and make it have center line and space.
Then, I put some blood texture on the wall to pair with my monster character.
Then, I put the broken floor texture too make this hospital more old and destroyed by something.
Besides, I start to edit the broken window and door into the horror scene.
After that, put some deadbody on the floor and blood, to create a scene that my monster character is eating the human.
After the background and scene is ready, then put the character into the scene and adjust it in suitable size and place.
After character involve inside the horror scene then i start to use wacom to paint the background and make it more realistic, bloody, horror, and interest.
FINAL PROJECT / FINAL CHARACTER :THE INFECTION
Practice artwork
anime scene
Anime face
没有评论:
发表评论