
In this task, we are going to learn how to model a 3D sculpture by using
Autodesk Mudbox.

Mudbox is a proprietary computer-based 3D sculpting and painting tool. Currently developed by Autodesk.
Reference
Before start to model, i have go to do some research and reference to create my own model.
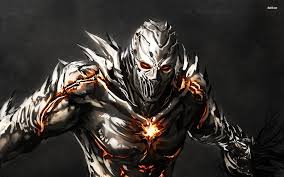
1st, i have plan to create a different version of a Dota hero (soul keeper)

So, i go to do research of some monster and demon

body

head

weapon

mask
face

logo

body shape

wings
Concept and body part sketching

Concept

body

head

cloth, itlem

side view

weapon

wings
Base model before sculpting
We create the base model of character in 3d max before sculpting in mudbox
1st, there are some free download 3d base model online, so we get download some base model that suitable to our character's body part or item.

I have download some base model from [Dota 2 Workshop-Technical Requirement]
It is a page for download the base model and weapon of the heroes. So the designer can download them to design some new items for dota 2 workshop to sell in the gaming market.


After download the base model(obj), i start to arrange them and change their shape ,pattern in 3Dmax according my character design.


After finish to the base model before sculpt, export it to [ obj ] file to make sure it can import to Mudbox for sculpt.

Tools Mudbox
After we finish model the base, import the obj file we saved in 3dmax and start to sculpt. There are some tools in Mudbox for sculpting.

There are different kind of brushes we can use in Sculpt tools list.

We can adjust the size [ , ] and strength ( M ) of brushes. Before that, we can use the Mirror function to sculpt 2part of area in same time. Invert Function is invert the brush and can sculpt holes or something concave.

Stamp and Stencil is a tools to help us sculpt the texture easily on the object by using a image.

Pose tools help to create the joint on the object and move the object according the pose we want by using Pose.

Select/Move tools is a base support tools like 3dmax, it help to translate,scale,rotate,select object.


Sculpt model in Mudbox
After the base model, i start to sculpt the model as detail as i can in Mudbox.

 |
| The in front of head and back side view of head. |

 | |||
| The cloth and some decoration |

 | |||
| The monster leg and the demon horn |

 |
| Wings back and front. |

 | ||
| The weapons |

 | ||
| Lightning texture in Mudbox |
Final Outcome After Render In 3Dmax
After finish the sculpting, export as [ obj ] file in mudbox and import back to 3dmax for do lightning and rendering to make it look nice and realistic.

 | ||
| back and the front of body |

 | ||
| Head medium close up and weapon |

 | |
| Full shot of back view |

 | |||
| Full shot of side view |
My Task One Final Artwork

Painting in Mudbox
In mudbox, we are able to paint our model with some tools.
 | |||||||
| We can open a new Paint layer to start to paint our model. We also can change the channel to different kind of function when creating new paint layer. For example: channel Bump is for paint the texture on the object with colour. We can choose the colour we want and also adjust the opacity of the layer. |
 | ||
| There are some paint tools list in mudbox to choose different way of paint. |
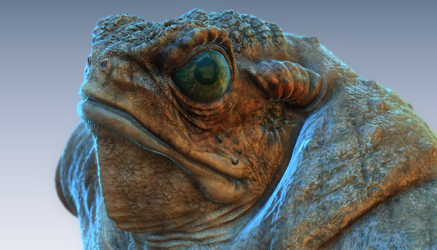
Second model in Mudbox
For learn painting in Mudbox, we are going to create our second model. Through some video reference from lecturer, im going to plan and create a huge monster model in mudbox.
Reference


 |
        Sketching,Base Model And Sculpting   
Sketching for different view of huge monster
         Painting For The Second Model      
I open a new specular layer to paint the shiny stone, because it will make it look more metal and enhance the highlight effect.
Final Outcome After Painting    
Different view of my final artwork
My Second Task Final Artwork   |
arrival of
回复删除alternatives
回复删除