2D ANIMATION
 In this semester, we learn about how to create 2D animation/ animate object in ADOBE AFTER EFFECT ( AE ). After effect is a digital visual effects, motion graphics, and compositing application develop by adobe system. It can used in process of filmmaking, tv production or used for keying, rotoscoping, compositing and animation. It is a very functional software for editor/ advertisement / movie.
.jpg)
.jpg)

1. Basic Animation Principles
1st, lecturer shows us some animation principles to let us more understand
about animation before we start to animate an object.
1.1 12 principles of animation ( http://the12principles.tumblr.com/ )

1.2 Animate
After that, lecturer start to teach us how to animate an object and start from
basic shape.
1st, go AI ( Adobe illustrator ) open a new file, remember change the size to
HDV 1080 before we create a shape.

After that, create a shape you want, save in AI file, then we are going to After
Effect to animate the shape.

In After effect, always remember to right click at ( project bar ) there and click
new composition to creata a composition just like create a new file. After that,
set ( preset ) to HDVTV 1080 25 and ( frame rate ) to 25 basically.


Then, import your ai file in to ( project ) and drag it to composition bar.

There are some transform to use to animate your object. Set the key and timing.


After set your key, u can turn the motion blur and select your keys and make
them to easy ease/ easy in and out. It totally make your object movement more
motion , move nature.


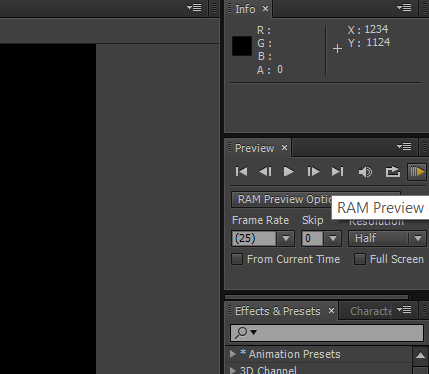
If add audio in video, press Ram preview to listen and check your audio that put
in.
After we done our short animation or other project, go ( composition ) then
( pre-render ) to render out our video. Change the format to quick time/ H.264
before render.


1.3 Basic Animation artwork
I love music. So i create my basic animation follow the music base sound.
1st try :
2. Masking
Masking is a way to make your object or words appear/disappear follow the line
we trace.
2.1 1st, open a new composition like before, then import the object / words you
want.

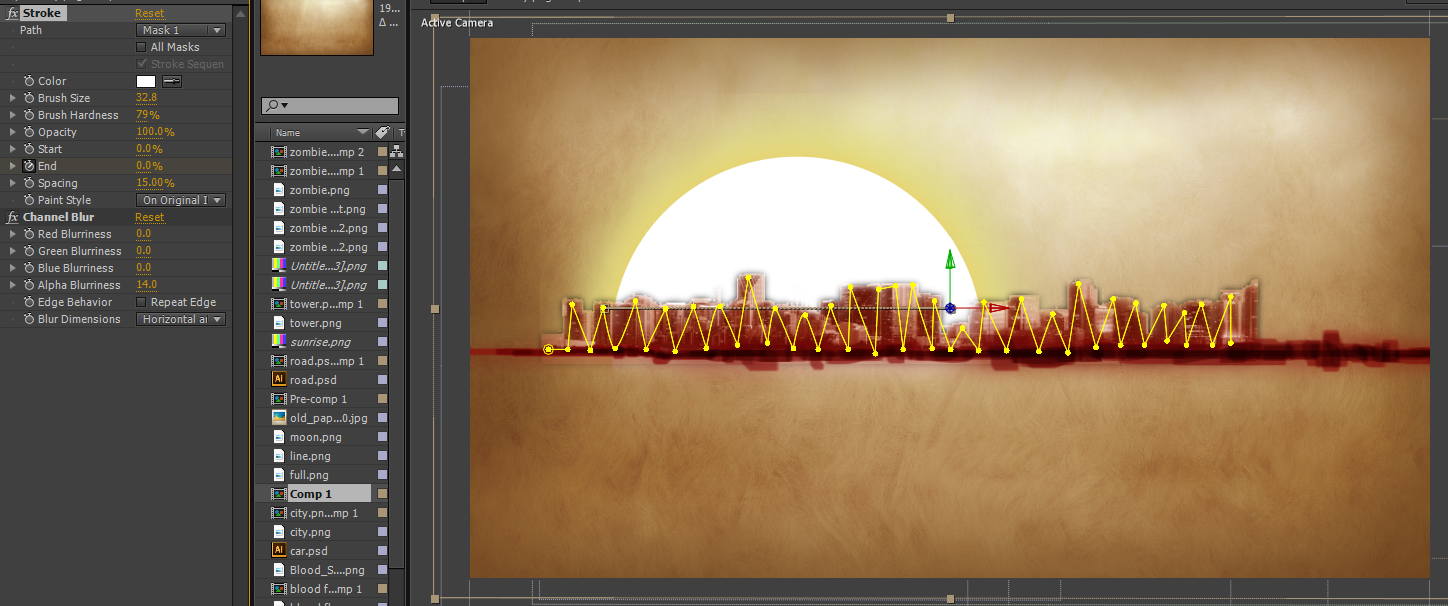
After that, use ( pen tools at top ) to trace the way you want to appear object/
words.


After then, go ( Effect )-( Generate )-( Stroke ) to create the effect that make the
object appear. 1st, change the brush to cover the object you want. Then, set the
( end key ) to adjust the timing when transition.


Then, remember change the paint style to ( reveal original image ). You will only
see the brush if you didnt change the paint style.

2.2 Example Of Masking
3. Rotoscoping
Rotoscoping is an animation technique, use the continous footage, frame by
frame to create a video
3.1 Rotoscoping in photoshop
In this task, lecturer want us to find the slow motion video to do the
rotoscoping video and we do it in photoshop.
1st, go photoshop, open a new file and change the preset to ( film&video )
and change the size to ( HDV 1080p/29.97 ) before start. After that, change
the ( essential ) to ( motion ) to create a video timeline.


After that, go ( Layer )-( Video layers )-( New Video layer from file ) to import
the video we choose. Then, go ( Layer )-( Video layers )-( New blank video
layers ) to create a new layer for us to draw and trace the footage frame by
frame.


Then, i start to trace the footage frame by frame with different colour.


I also try to trace other video/footage and fill in the colour.

After finish, go ( file )-( Export )-( Render video ) to render it.

3.2 Example of rotoscoping
4. Channel Id
There are many type of channel id on tv nowadays, on news, advertisement or tv
series show.
4.1 Channel id ( image/shapes)
In this task, we learn about how to use footage to create a basic channel id
video. The image we research or download must be PNG file.
4.2 Camera
Before start, lecturer teach us how to use ( camera ) to make the channel id/
video more interest and look 3D.
1st, right click on composition bar ( new )-( camera ) to create a camera.

After that, go camera and set its ( preset ), basically we set to 28mm/35mm

We can change the view to let us adjust the camera.


Camera also have ( transform ) to let us move it, zoom in/out, rotate and etc.

Camera Option like normal camera function, it can adjust your depth of field,
Blur level, Aperture, Focus Distance to make the thing u create look 3D.

Here has a simple example how to use camera in your video. 1st, I import the
PNG image and arrange their distance using scale.

Before start to transform the camera, we must click the 3D box ( 3D Layer )
to allow the layer to be manipualted in 3 dimension.

Because of 3D layer, so we can adjust the distance between the images ( behind,
medium, front ). We also can turn on th ( depth of field ) and higher the
( aperture ) to make it more feel of distance.

Move the camera and adjust the ( focus distance ) and ( aperture ) to create
more depth of field effect.

4.3 Channel id ( artwork )
After learned the camera work, we are going to create our own channel id,
because i not so good in camera, then i try to create a 2d channel id.
1st, my idea is walking dead channel id, so i need to go research some png
image and create the brush i want in photoshop.


After that, use some technique we learned before ( masking ), image
( transform ) to edit our channel id.

Then, use camera to create some zoon in and depth of field on scene.

Go ( effect )-( Colour Correction )-( Hue/Saturation ) to change/ adjust the scene
colour range. I also go ( effect )-( Transition ) to create some appear effect on
the zombie.


4.4 Channel id artwork
5. Motion graphics
Motion graphics is a simple colour 2D flat animation and are nowadays use in
advertisement, company motion logo and etc. As holiday homework, lecturer
orderd us to create our own short motion video. It like the basic animation but
more details and more difficult.
5.1 Simple motion graphic.
1st, i go research other motion graphic to get more idea about shape
animation. After that, i start to go AI to create the shape i want and import
into AE.


After that, i start my motion graphic using a transition ( effect )-( transition) )-
( radial wipe ). This transition is rotate 360' and appear your object. So, i use a
few backgroud with different colour and ( radial wipe ) it make it appear
continuosly.

Then, put the object and start animate it.

I also use masking to appear my red brush, earthquake and use camera move to
create some earthquake vibrate. Then, i also use scale and position to appear
the down word.


So, play around with the ( transform ) to motion graphic make it more vivid.
transition also a important point in a motion graphic video.


5.1 Motion Graphic Artwork
6. Parallax
In this task, we learn about PARALLAX EFFECT. As easy say, parallax effect is
make a fixed picture to move through after effect. Example, we cant shot the
movement of an animal move because they move too fast. So, we take the
picture and go AE and animate them, make them move.
Example video : https://www.youtube.com/results?search_query=wwf+parallax
6.1 Create Parallax
As a beginner, lecturer want us to research and download some animal
animal picture for the parallax. So, i have download some picture i want.


1st step we need to is go photoshop and trace out the animal.

After that, go ( edit )-( copy ) to copy your selection, then click ( paste ), so your
selection will become other new layer and separate from background.


We separate the background and the object because we need to import to AE
If we straight import this image into AE , we cant edit it one by one but whole
image.
After we separate, go back to background, right click and click ( reselect )

Then, right click again and click ( Fill ), then select ( content- Aware )


So, so the horse is not in the background ad, but there are some place are not
logical as background, so use ( clone stamp tool ) to solve it.


After we got the horse png image and the background, save in as photoshop file
and import to AE.

Before start, like the camera task, click the ( 3d box/ 3d Layers ) and arrange the
position of images, which one in front and which one behind. Open depth of field
and adjust aperture.


After that, to make it more realistic, i go online search and download some sand
splash, flare effect and add to the scene.


After set up all the arrangement, we start to animate it, make it move.
So, ( PIN ) is one of the ways to animate fixed object.

1st, we pin the part we want to move it or remain no change, because pin will
effect other part that when we move it.

So, set the pin key ( puppet ) and move it follow the timing. The movement
cannot be too more or fast, because it will look like a little bit fake, slow motion
cannot be too more or fast, because it will look like a little bit fake, slow motion
is better.


To make it more realistic, i also pin the sand and animate the dust.


After that, like before , play the ( camera, transform ) to make the video more
interest. Example : use position and move the horse a little bit, make it totally
moving in a slow motion.
6.2 Parallax Artwork
( Photoshop edit )-( Arrange it in AE )-( 3D layers and camera )-( Pin and set
key )-( overall adjust camera and object transform )
7. Motion Tracking
With motion tracking, you can track the movement of an object and then apply the tracking data for that movement to another object—such as another layer or an effect control point—to create compositions in which images and effects follow the motion.

1st, i create a motion circle in other composition before i start to track it on a video.

After that, put the circle composition into the video i download and go WINDOW - TRACKER to show out the tools.

After that, click the TRACK MOTION and it have 2 box there. Use the 2 box put it at the point you want to track.

After that, click the EDIT TARGET and apply motion to LAYER and choose the circle that i create to let my circle track to the moving object.


So, there will be some keyframes that the circle track to the moving object.

8.Final Assignment 2D Animation
1st, lecturer want us to create our own short 10 s funny animation video. We do this final assignment with group. After we create our own storyline and we need to draw storyboard before we start to animate.
Some storyboard example that we draw:


Finaly we choose SEAL AND WHALE story as our final artwork. 1st, we start with build and trace the character that we want before we use them to animate.
Research


Build the character in ADOBE ILLUSTRATOR


Build the environment in ADOBE ILLUSTRATOR


Decoration of environment and openning
1st, i open other composition and place the birds on the ice and use pumpet and play
the keyframe to move the birds.

Then, i also open a new composition and place the seals on the ice, adjust the
transform and keyframe before put in to enviroment background

After finish, i combined this 2 composition and become my openning of the story.
I also add in some cloud png to make the environment realistic.


Visual storytelling
In the beginning of the video was use with establishing shot, so, to introduce our
story we will have a full shot of character to let audience understand the character's
situation. And we also create other image in AI to make the character blinking their
eyes.


After that, to introduce the style of character , we close up to the chracter and one by
one show their face emotion with blinking eye.
The bigger seal keep sleeping and low sensitive
The grey seal is a cool and calm guys
The small seal is cute and the most powerful one( in the end )


Whale
1st, we go AI and trace the top fin of whale and some water flow like the whale is
swimming.


After that, import the whale's fin into the scene. We also go the small seal
composition and use the side image of small seal that we trace in AI to create the
scene that the small seal found the whale.


Beside, i also go effect and use TURBURLENT DISPLACE to the sea image to make it
more realistic and nicely.


After that, i adjust the transform of the whale's fin and the position of sea, to make
overall look like the whale turn back and swim very fast toward the seal.


The Whale come out half of body and going to jump toward the seal scene.

Seal visual story
An 1 second close up scene to show the grey seal also found that the whale going to
eat them but the big seal still sleeping.

Beside, i also adjust the keyframe and position and show the grey seal put the big
seal to the side of the ice to make it unbalance and sink to other side. To let audience
know that the seal wil do something to prevent the attack of whale.


Texture
Lecturer was tell us to put some texture into our video to make it more nice and
cartoon feel.


Before

After

Final scene
Final scene is a slow motion scene, because we can see everybody is in the slow
motion but the small seal is doing exercise and jump and fall to the top of other seal
as normal speed and motion. It enhance the stronger and powerful of small seal
And its cute and movement will let audience more understand and interest.

没有评论:
发表评论